div로 layout
1. HTML 파일
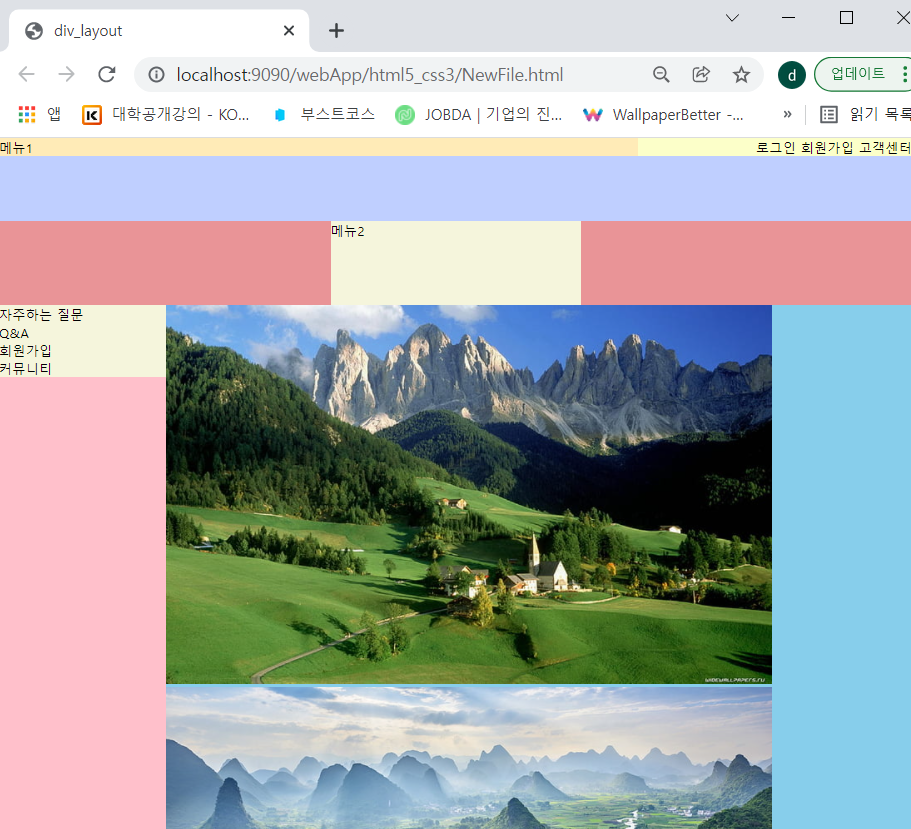
- top과 header / mainContent / bottom 이렇게 세 부분으로 나누었다.
<div id="top">
	<div style="background:#FFEBB7">메뉴1</div>
	<div style="background:#FCFFC9">로그인 회원가입 고객센터</div>
</div>
<div id="header">
	<div>메뉴2</div>
</div>

<div id="mainContent">
	<div>
		<ul>
		    <li>자주하는 질문</li>
		    <li>Q&A</li>
		    <li>회원가입</li>
		    <li>커뮤니티</li>
		</ul>
	</div>
	<div>
		<img src="../img/img1.jpg"/>
		<img src="../img/img2.jpg"/>
		<img src="../img/img3.jpg"/>
		<img src="../img/img4.jpg"/>
	</div>
</div>

<div id="bottom">Footer</div>
2. CSS파일(top과 header:상단)
@charset "UTF-8";

/*ul은 기본적으로 위쪽에 margin이 있다. 그래서 body, ul, li는 margin:0, padding:0으로 한다.*/
body, ul, li{margin:0; padding:0; list-style-type:none;}

/*상단*/
#top{height:100px; background:#BFCFFF;}

#top>div{float:left;}            /*메뉴1로그인회원가입고객센터를 한 줄에 정렬*/
#top>div:first-child{width:70%;} /*메뉴1을 70% 범위 확보*/
#top>div:last-child{width:30%; text-align:right;} /*나머지 top의 div를 오른쪽 정렬, 30% 범위*/

#header{height:100px; background:#E99497;}

#header>div{ /*메뉴2가 들어간 div*/
	height:100px; background:beige; width:300px;
	margin:0 auto; /*margin 0 auto로 하면 가운데 정렬됨*/
}3. CSS파일(mainContent, 컨텐츠)
1)
@charset "UTF-8";

/*ul은 기본적으로 위쪽에 margin이 있다. 그래서 body, ul, li는 margin:0, padding:0으로 한다.*/
body, ul, li{margin:0; padding:0; list-style-type:none;}

/*상단*/

/*컨텐츠*/
#mainContent{
	width:1200px; margin:0 auto;
}

#mainContent>div{float:left;}                                  /*mainContent 정렬*/
#mainContent>div:first-child{width:200px; background:beige;}   /*ul이 있는 div*/
#mainContent>div:last-child{width:1000px; background:skyblue;} /*img가 있는 div*/
- 컨텐츠 내용만큼 높이를 확보해야 footer가 올라오지 않는다.! 높이를 확보하려면 overflow
2)
@charset "UTF-8";

/*ul은 기본적으로 위쪽에 margin이 있다. 그래서 body, ul, li는 margin:0, padding:0으로 한다.*/
body, ul, li{margin:0; padding:0; list-style-type:none;}

/*상단*/

/*컨텐츠*/
#mainContent{width:1200px; margin:0 auto; background:pink; overflow:auto;}

#mainContent>div{float:left;}               /*mainContent 정렬*/
#mainContent>div:first-child{width:200px; background:beige;}  /*ul이 있는 div*/
#mainContent>div:last-child{width:1000px; background:skyblue;}  /*img가 있는 div*/
- mainContent의 핑크가 실제로는 beige와 blue까지 다 포함한다.
4. CSS파일(footer bottom)
@charset "UTF-8";

/*ul은 기본적으로 위쪽에 margin이 있다. 그래서 body, ul, li는 margin:0, padding:0으로 한다.*/
body, ul, li{margin:0; padding:0; list-style-type:none;}

/*상단*/

/*컨텐츠*/

/*footer*/
#bottom{
	height:100px; text-align:center;
	background:lightgray; color:#693C72; font-size:1.6em;
}
5. 전체 CSS 코드
@charset "UTF-8";

body, ul, li{margin:0; padding:0; list-style-type:none;}

/*상단*/
#top{height:100px; background:#BFCFFF;}

#top>div{float:left;}
#top>div:first-child{width:70%;}
#top>div:last-child{width:30%; text-align:right;}

#header{height:100px; background:#E99497;}

#header>div{ /*메뉴2가 들어간 div*/
	height:100px; background:beige; width:300px;
	margin:0 auto; /*margin 0 auto로 하면 가운데 정렬됨*/
}

/*컨텐츠*/
#mainContent{width:1200px; margin:0 auto; background:pink;overflow:auto;}

#mainContent>div{float:left;}
#mainContent>div:first-child{width:200px;}
#mainContent>div:last-child{width:1000px;}

/*footer*/
#bottom{
	height:100px; text-align:center;
	background:lightgray; color:#693C72; font-size:1.6em;
}
Semantic tag로 layout
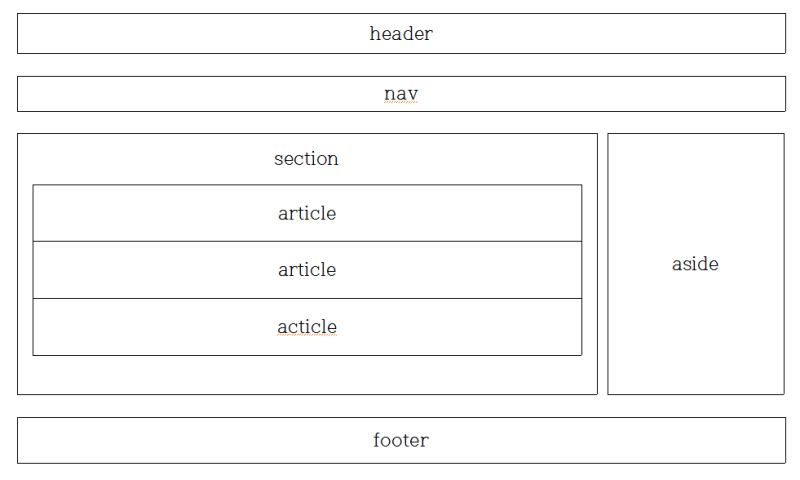
- 컴퓨터 프로그램의 코드를 읽고 의미를 인식할 수 있는 지능형 웹(특정 태그에 의미를 부여함-> 가독성 좋음)

| header | 페이지상단, 머리말(페이지제목, 페이지 소개) |
| nav | 링크가 걸린 곳, 하이퍼링크들을 모아 둔 네비게이션 |
| aside | 사이드메뉴, 본문 흐름에 벗어나는 노트나 팁 |
| section | 컨텐츠, 문서의 장이나 절에 해당하는 내용 |
| article | 본문과 독립적인 콘텐츠 영역 |
| footer | 페이지 하단, 꼬리말(저자나 저작권 정보) |
1.HTML 파일
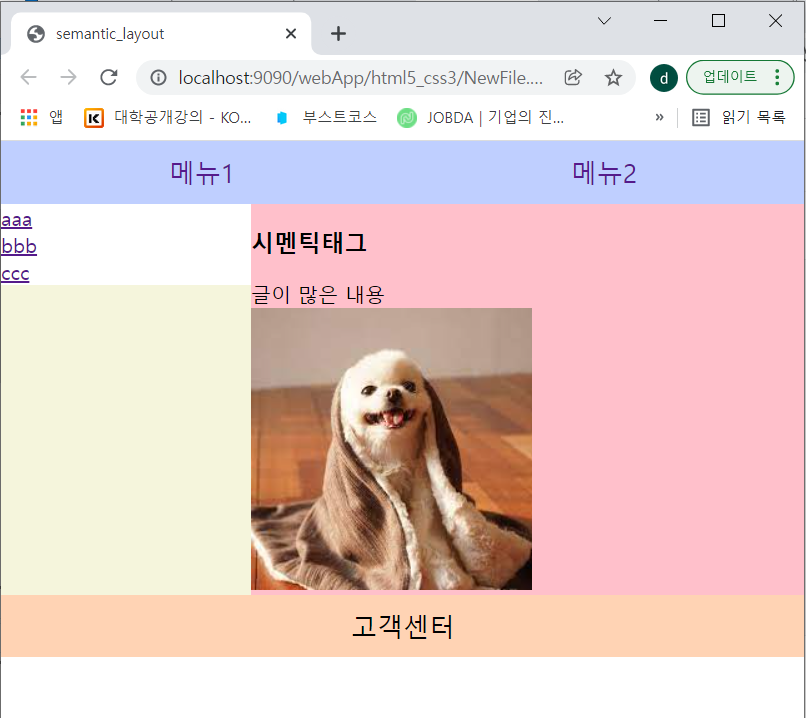
- header(nav와 ul) / section(aside, section(content)) / footer로 나누었다.
<header>
	<nav>
		<ul>
			<li><a href="#">메뉴1</a></li>
			<li><a href="#">메뉴2</a></li>
		</ul>
	</nav>
</header>

<section>
	<aside>
		<nav>
			<ul>
				<li><a href="#">aaa</a></li>
				<li><a href="#">bbb</a></li>
				<li><a href="#">ccc</a></li>
			</ul>
		</nav>
	</aside>
	<section class="content">
		<h1>시멘틱태그</h1>
		<article>글이 많은 내용</article>
		<img src="../img/dog2.jfif"/>
	</section>
</section>

<footer>
	<nav>고객센터</nav>
</footer>
2. CSS 파일(header 부분)
@charset "UTF-8";

/*초기화*/
body,ul,li { margin:0; padding:0; list-style-type:none; }

/*header*/
header{height:50px; background: #BFCFFF;}
header li{
	float:left; height:50px; width:50%;  /*ul을 정렬하고 각 50%씩 차지하게 하기*/
	line-height:50px; text-align:center; /*line-height로 위아래에서 가운데 정렬, text-align으로 왼오에서 가운데정렬*/
	font-size:1.3em;
}
header a:link, header a:visited {
	text-decoration:none;
}
3. CSS 파일(컨텐츠부분, section)
@charset "UTF-8";

/*초기화*/

/*header*/


/*컨텐츠*/
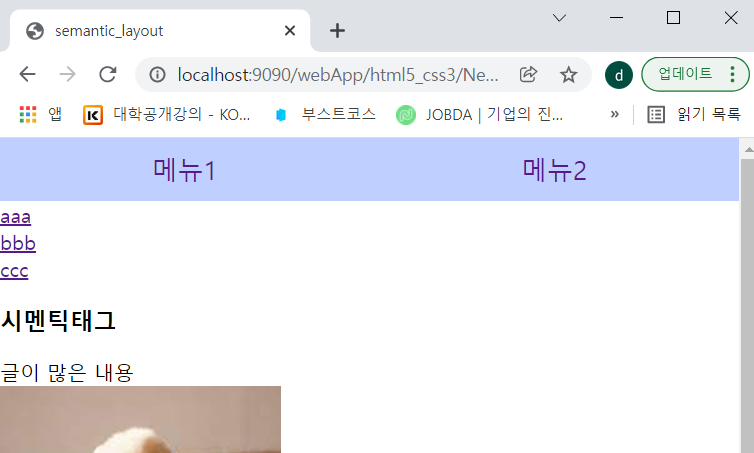
body>section>*{float:left;} /*body의 section의 모든 선택자를 정렬(한줄에)*/

body>section{ /*footer를 내려가게 하기 위해서 overflow를 사용(공간확보를 위해서)*/
	width:1200px; margin: 0 auto; background:beige; overflow:auto;
}

aside {width:200px; background:white;}
.content{width:1000px; background:pink;}
4. CSS 파일(footer부분)
@charset "UTF-8";

/*초기화*/

/*header*/

/*컨텐츠*/

/*footer*/

footer {
	height:50px; background:#FFD3B4; font-size:1.3em;
	line-height:50px; text-align:center;
}
5. 전체 CSS 코드
@charset "UTF-8";

body,ul,li { margin:0; padding:0; list-style-type:none; }

/*header*/
header{height:50px; background: #BFCFFF;}
header li{
	float:left; height:50px; width:50%;
	line-height:50px; text-align:center;
	font-size:1.3em;
}
header a:link, header a:visited {
	text-decoration:none;
}

/*컨텐츠*/
body>section>*{float:left;}

body>section{
	width:1200px; margin: 0 auto; background:beige; overflow:auto;
}
aside {width:200px; background:white;}
.content{width:1000px; background:pink;}

/*footer*/
footer {
	height:50px; background:#FFD3B4; font-size:1.3em;
	line-height:50px; text-align:center;
}'멀티캠퍼스 풀스택 과정 > 프론트엔드' 카테고리의 다른 글
| 프론트엔드2-3. tab메뉴 만들기 (0) | 2022.02.08 |
|---|---|
| 프론트엔드2-2. 반응형 웹(미디어쿼리)과 meta 태그 (0) | 2022.02.07 |
| 프론트엔드1-10. css transition(예제) / visibility와 display (0) | 2022.02.07 |
| 프론트엔드1-9. margin과 padding (0) | 2022.02.07 |
| 프론트엔드1-8. CSS border속성 (0) | 2022.02.05 |


